Control Junk Email
Spam is unwanted advertising or junk email that clutter your inbox.
SurgeWeb incorporates new features to help manage or eliminate this annoyance. SurgeWeb will filter out many spam messages before they arrive in your Inbox. It will quarantine some suspicious messages for you to review before they clutter your email.
The Spam Control features work without requiring your input, but you can also customize these features to make them work best for you.
Accessing Spam Control
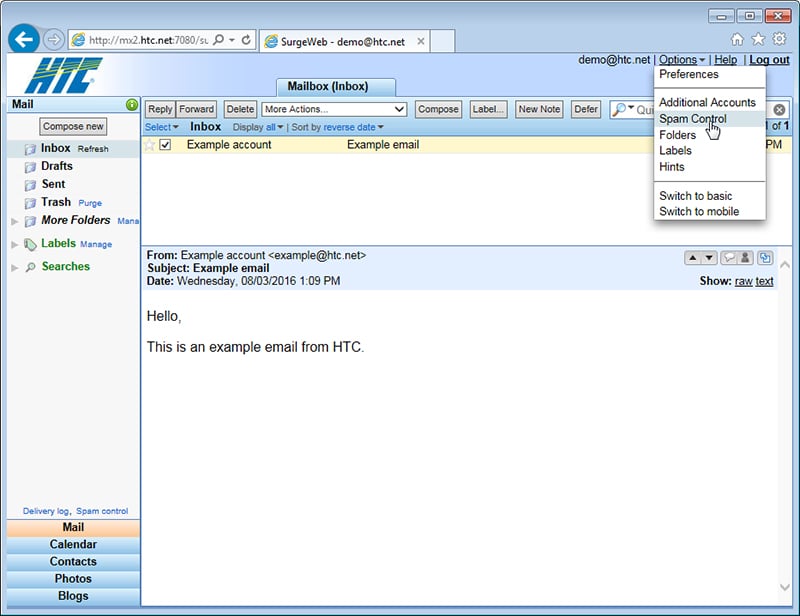
First, click Options in the upper right. In the pop-up menu that appears, click Spam Control.
Navigating Spam Control Settings
The pop-up screen contains a number of sections for managing your spam control features. Each button at the top will take you to a different section. The sections that are commonly used are explained below.
Obsolete Held Messages
The spam filtering method that you may have used in the previously is still accessible by clicking Obsolete.
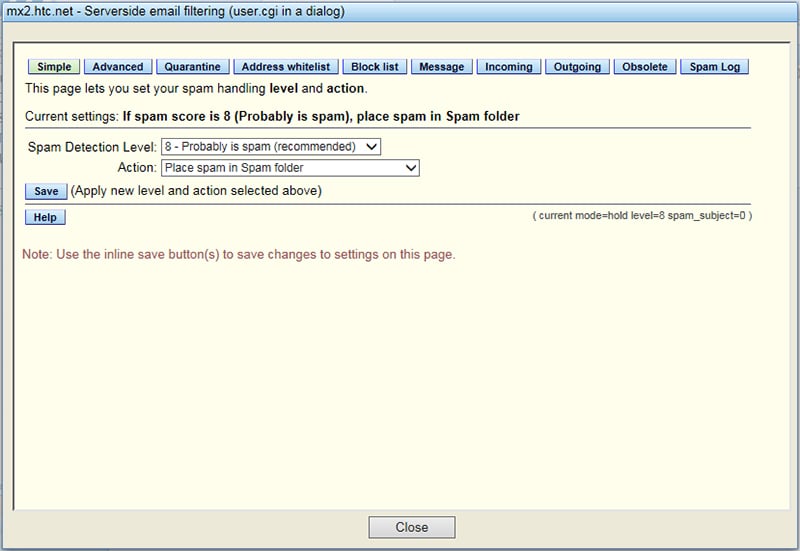
To access your held messages, click Held Messages. The Held Messages screen works the same way that it did in the previous email system. These messages can be deleted by selecting the messages and clicking Delete at the bottom of the screen. If you find a message in your spam filter that you would like to receive, click the checkmark next to the message, and then click on Release at the bottom of the screen if you want to let that message through just this one time. Or select Allow if you want to add this address to your whitelist so email from that address is always allowed through.
Obsolete Held Messages Settings
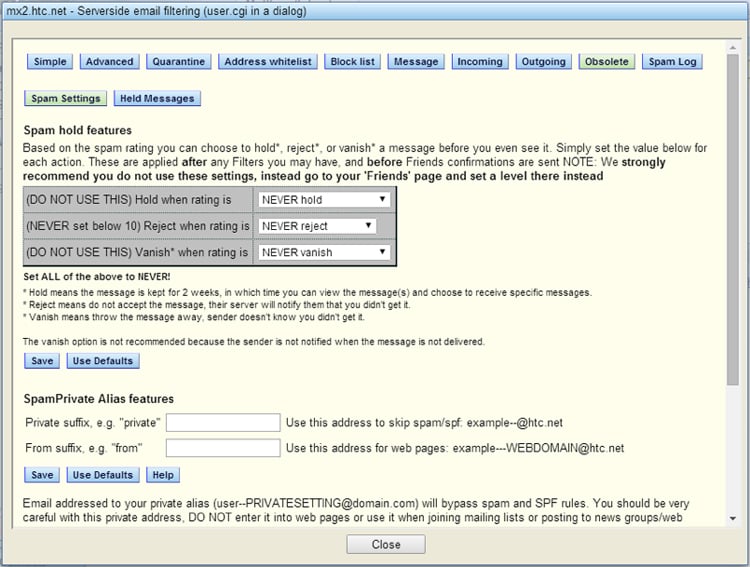
You can still adjust settings for the spam filtering method that you may be more familiar with by clicking Obsolete and then Spam Settings. By default, accounts will have the Spam Settings on this screen set to Hold +5, Reject +15, or Never vanish messages. Users that have adjusted these settings manually in the past will still keep those settings. Any user can adjust these settings here. You can keep your settings, but it may be preferable to switch to the new method of Spam Control. To switch from Obsolete to the new Spam Control system, you can use the Simple settings screen. For more details, see the Recommended Settings section below.
Navigating Spam Control Settings
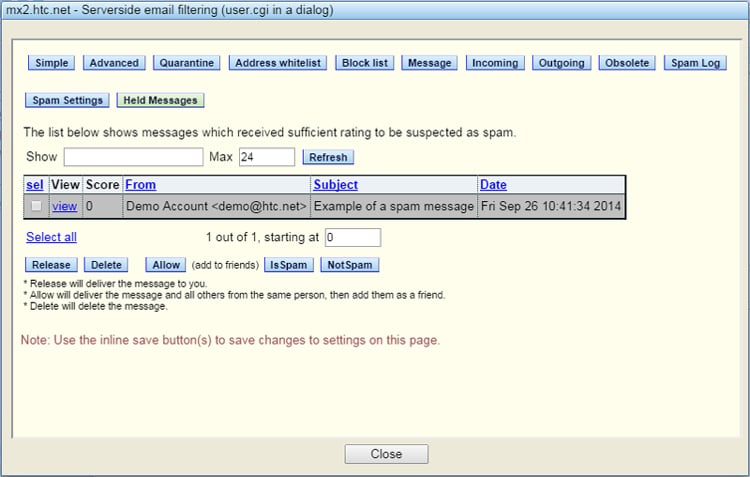
You can manage your spam control settings with only two steps. The Simple page contains both of these settings. They are the Spam Detection Level and the Action settings:

Recommended Settings
The screen below shows the initial default settings for new users. We recommend that users who want spam filtering enabled use the Simple settings. Leave the Spam Detection Level at 8 and change the Action: to Place Spam in Spam folder. Then click Save. With these simple settings, most spam will be filtered. Other messages that are likely to be spam but are still worth reviewing will automatically be placed in a Spam folder on your main screen.

Advanced
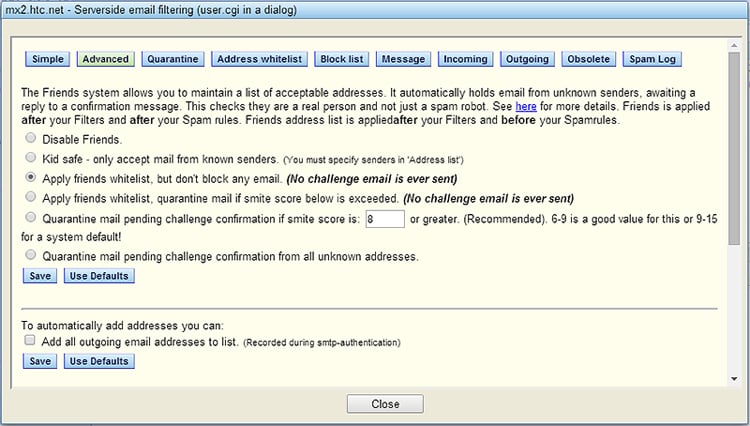
The Advanced Section allows you to manage the Friends system. By default, the Friends system allows you to whitelist senders that you know. Anyone on the whitelist will automatically be approved as a sender to you. Advanced Quarantine features can be very useful in eliminating a large amount of spam. Setting one of the last two Quarantine mail pending challenge confirmation options will tell the system to send confirmation messages to unrecognized senders.
The first time a person sends a message to you, they will receive a response that asks them to click a link to prove they are a real person before their message is delivered. Once they click this link the message will be delivered right away. This simple method works because almost 100% of spam does not come from a person directly. Spam is generated by automated systems that cannot respond to this email. Senders only need to click this confirmation message once. They will then be whitelisted and can send to you in the future without being prompted again.
Whitelist
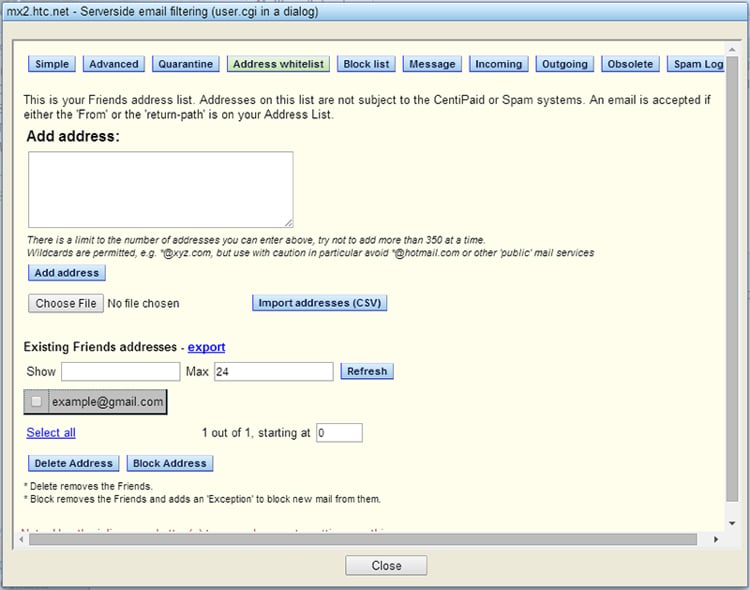
Several of the features listed above use the Whitelist. Email addresses on your whitelist are approved to send to you and will not be blocked by Spam Control. To manage your whitelist, click Address whitelist. If there are entries in your whitelist already, they will appear below Existing Friends addresses. To add a new address, type it in the white box and click Add address.
Note: You can also import a list of addresses in CSV format. Many email programs allow you to export your contact list in CSV format. If you are comfortable doing so, you can whitelist an existing contact list using this import method.
